18 Layered Shag Hairstyles for Women Over 50 With Fine Hair Wanting a Fuller Look
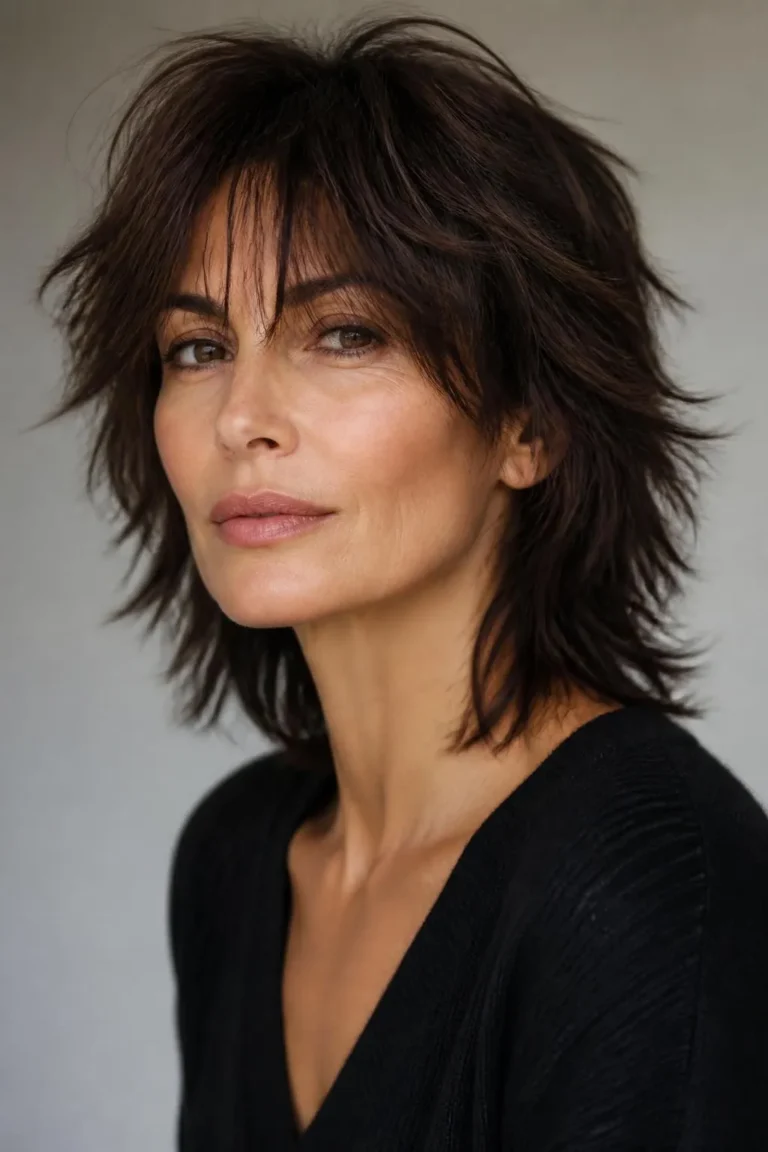
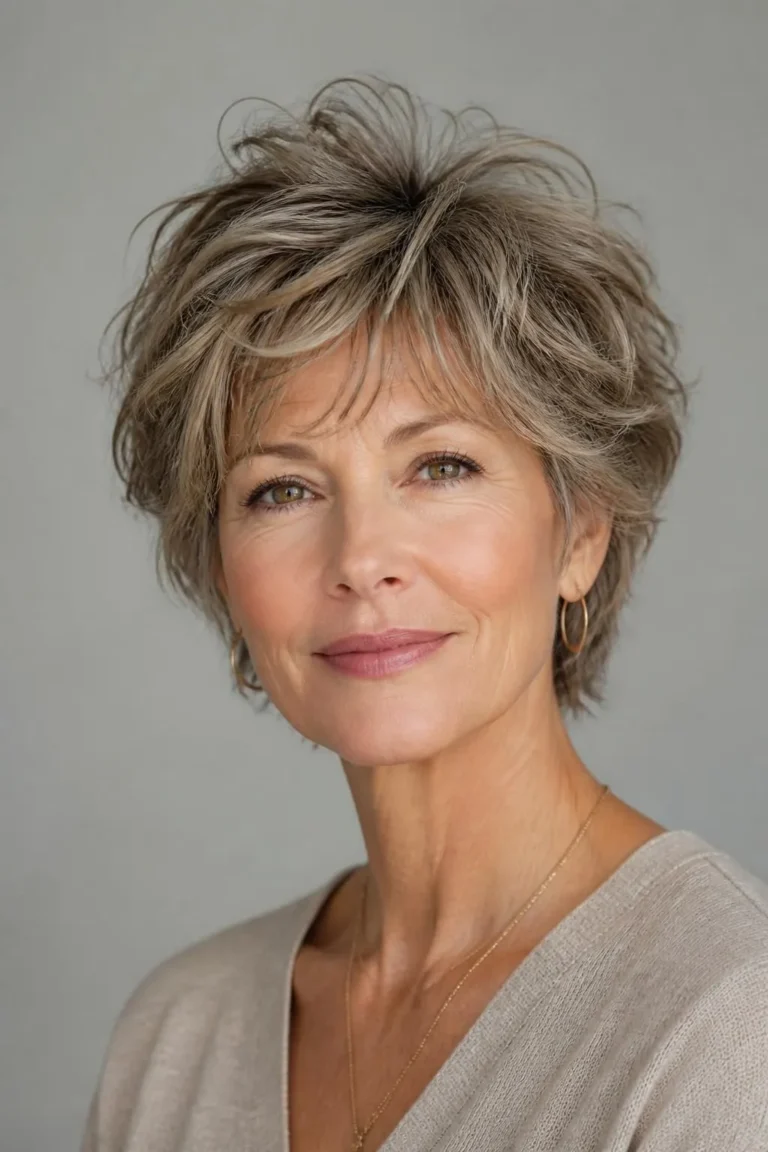
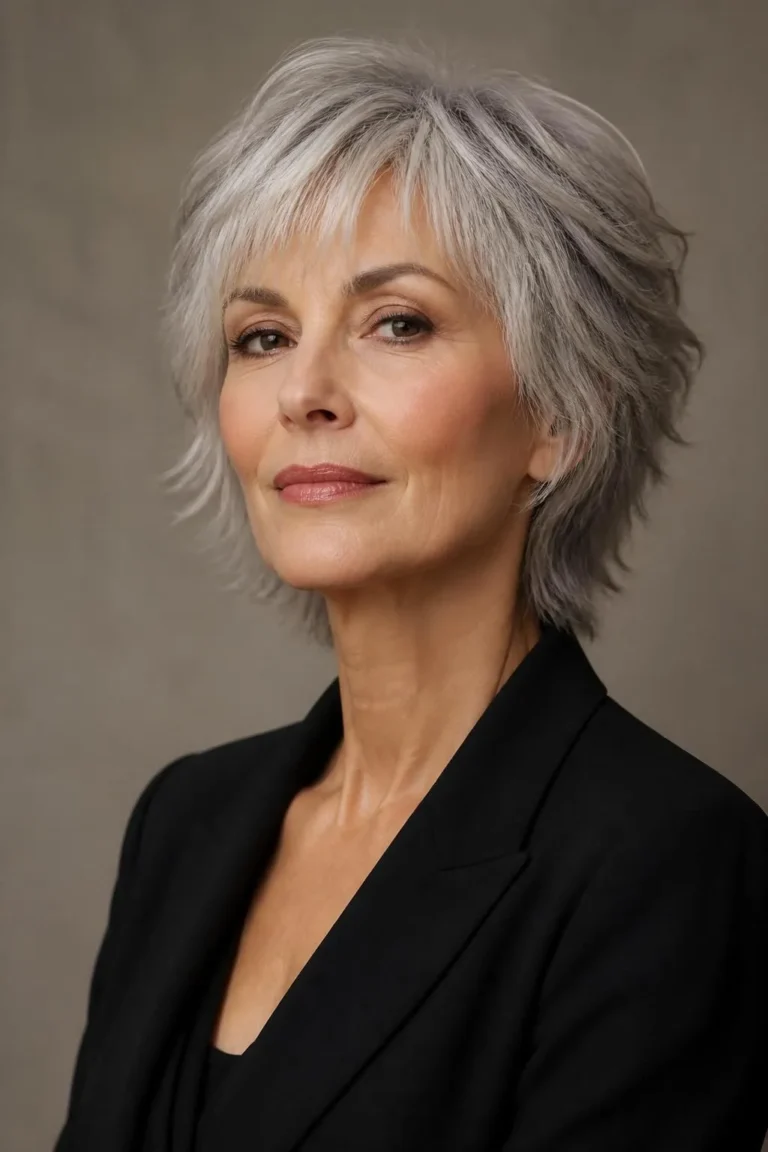
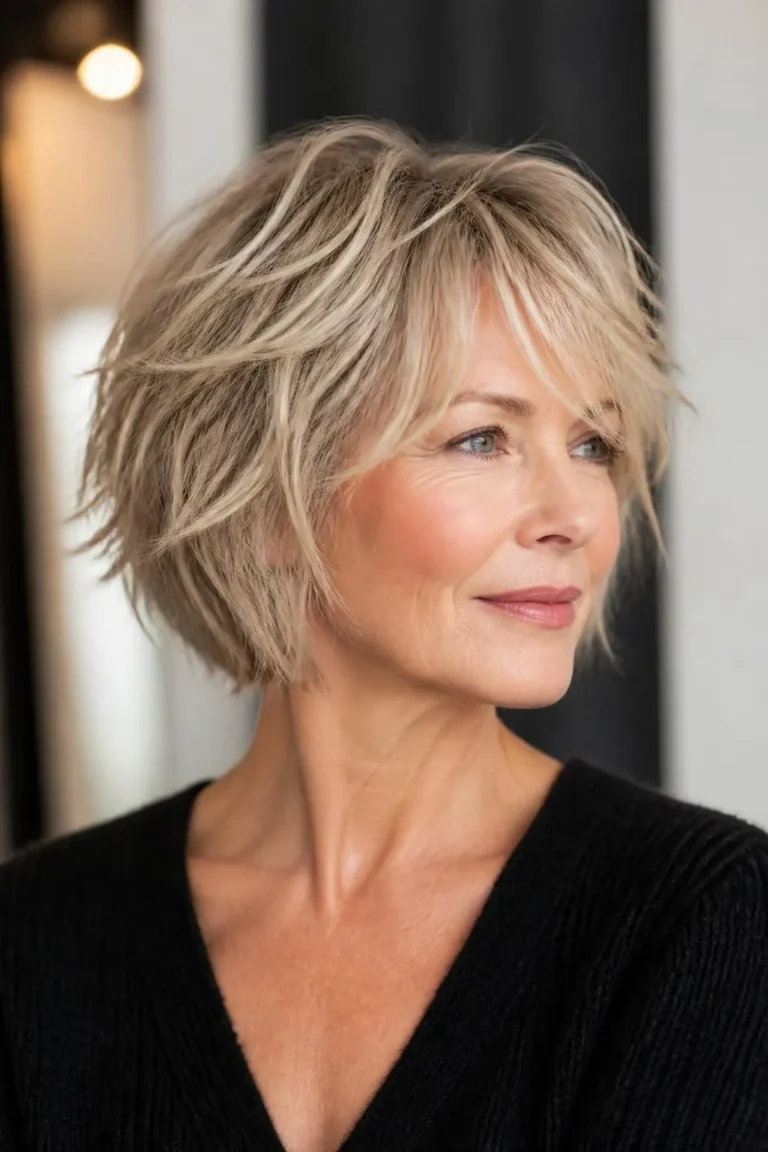
Fine hair after 50 often loses the natural body it once had, but a layered shag haircut can bring that fullness right back. By cutting hair into strategic layers of different lengths, a shag creates built-in texture and lift that thin, fine strands simply can’t achieve on their own. The layers catch light differently and move independently, which gives the eye the impression of much thicker, healthier hair.
Below are 18 layered shag hairstyles chosen specifically for women over 50 who want more fullness without sacrificing ease of styling. Each option focuses on where layers are placed, how they’re cut, and simple styling tricks that maximize volume at the roots and movement through the ends.
Here are 18 layered shag hairstyles designed to give fine hair a fuller, more youthful appearance with minimal daily effort.
1. Classic Long Layered Shag
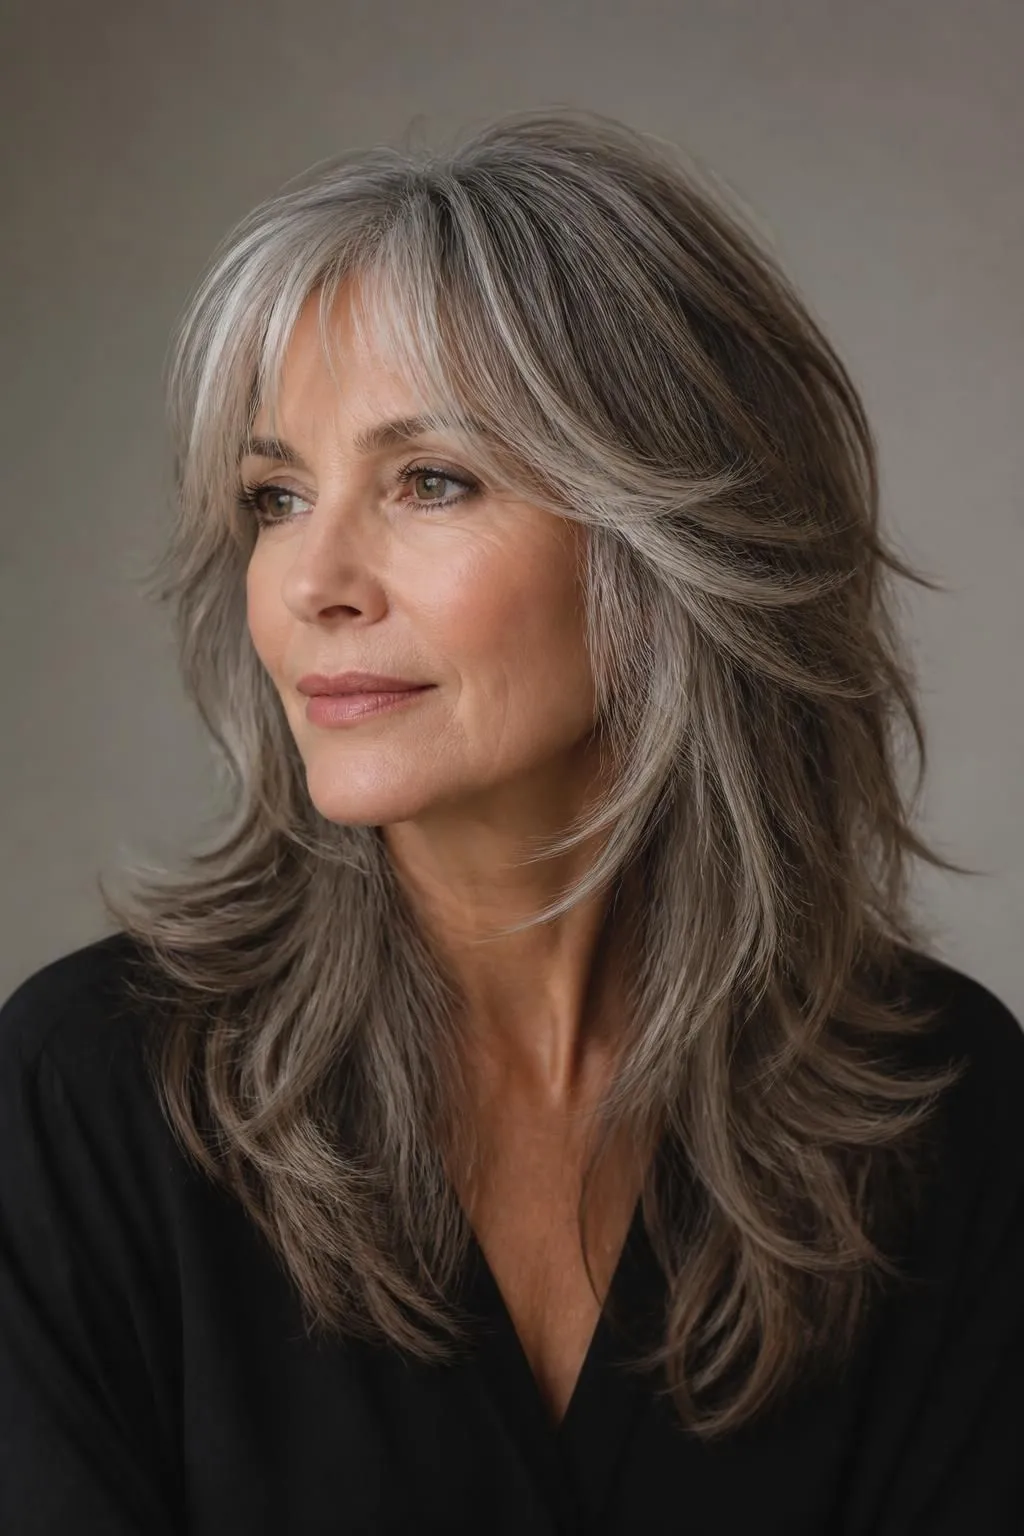
The classic long layered shag keeps length past the shoulders while adding layers throughout to prevent the hair from looking flat and heavy. For fine hair, this is important because long, one-length hair tends to pull straight down under its own weight. Layers break up that weight, allowing sections to fall with more bounce and separation.
This style also offers plenty of versatility. It can be worn straight and sleek or styled with loose waves, and the layers make both looks appear fuller than they would on a blunt, unlayered cut.
Tips for Styling a Long Layered Shag
- Blow-dry upside down for two to three minutes to build volume at the roots.
- Use a volumizing mousse on damp hair before styling.
- Finish with a light-hold spray to keep layers separated throughout the day.
2. Short Layered Shag
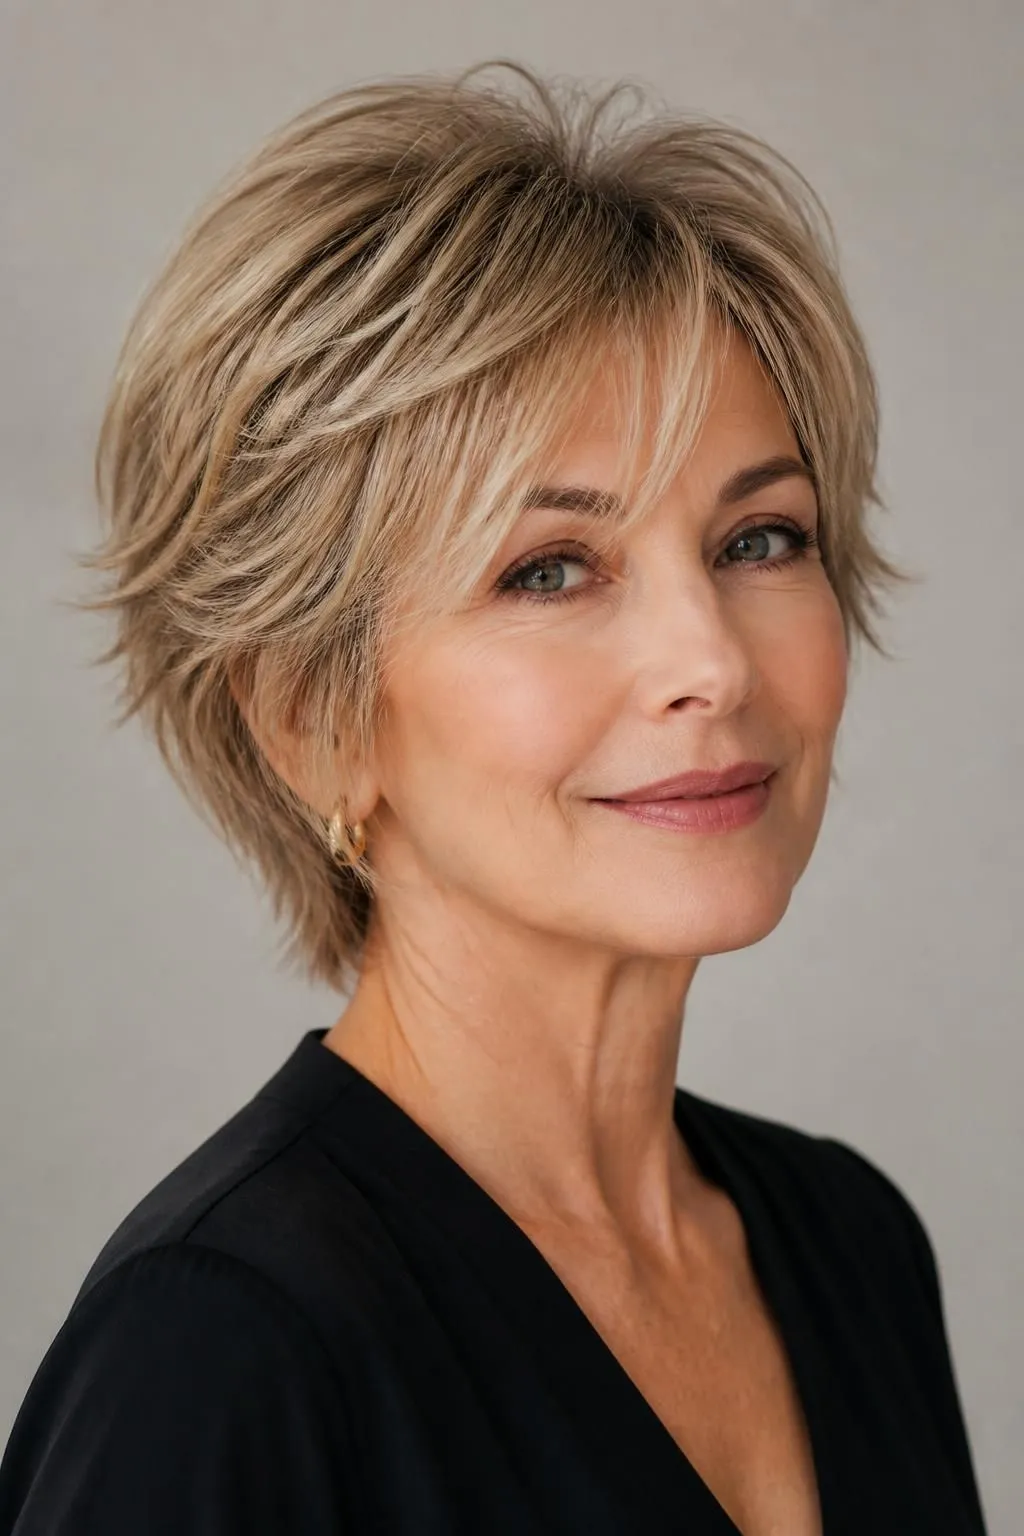
A short layered shag sits above the shoulders, often between chin and collarbone length, and uses shorter layers to maximize lift. Because there’s less hair overall, the weight pulling strands down is reduced, making it easier for fine hair to hold volume and shape throughout the day.
This length is also quick to style and dries faster than longer cuts, which makes it a practical choice for those wanting a low-maintenance routine that still looks polished.
Tips for Styling a Short Layered Shag
- Apply root-lifting spray directly to damp roots before blow-drying.
- Use a small round brush to add curve and volume near the crown.
- Finger-style the ends for a soft, textured finish instead of brushing them flat.
3. Layered Shag with Curtain Bangs
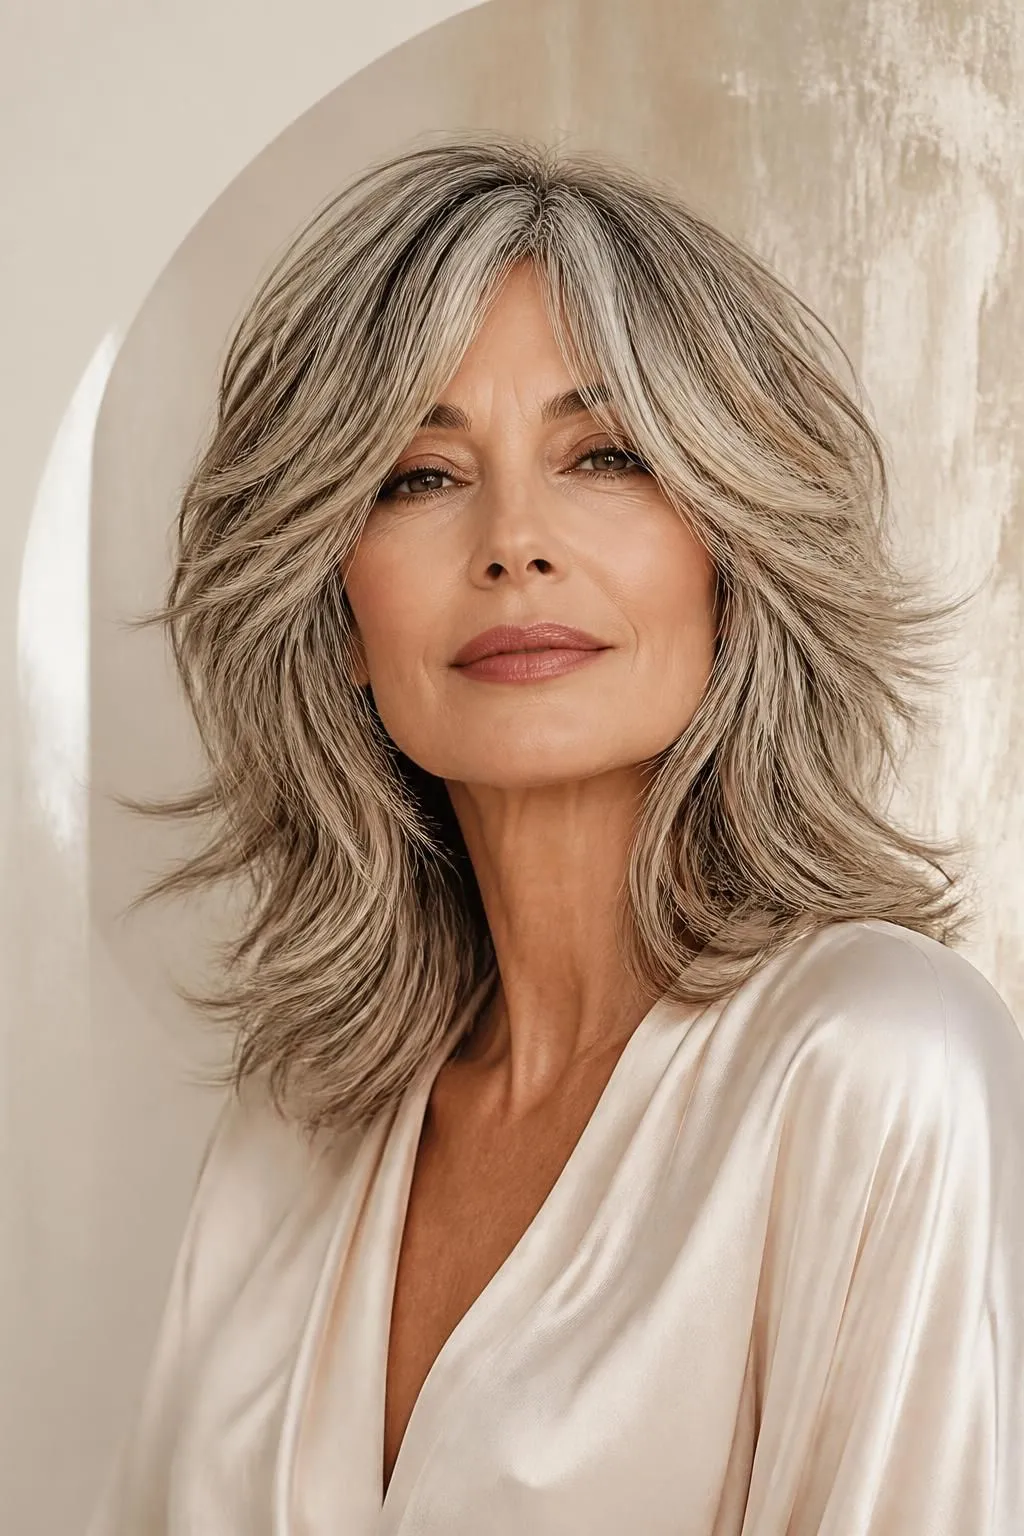
Curtain bangs part in the middle and sweep softly to both sides, blending naturally into the surrounding shag layers. This combination frames the face gently while adding extra fullness around the forehead, an area that often thins first with age. The seamless blend between bangs and layers makes the whole style look cohesive and soft.
This is a popular choice because curtain bangs grow out gracefully, merging into the rest of the shag over time rather than requiring frequent bang trims.
Tips for Styling Curtain Bangs
- Round-brush bangs outward while drying for a soft, swept shape.
- Use a light styling cream to prevent bangs from looking limp.
- Set bangs briefly with a cool air blast to help them hold their curve.
4. Layered Shag Bob
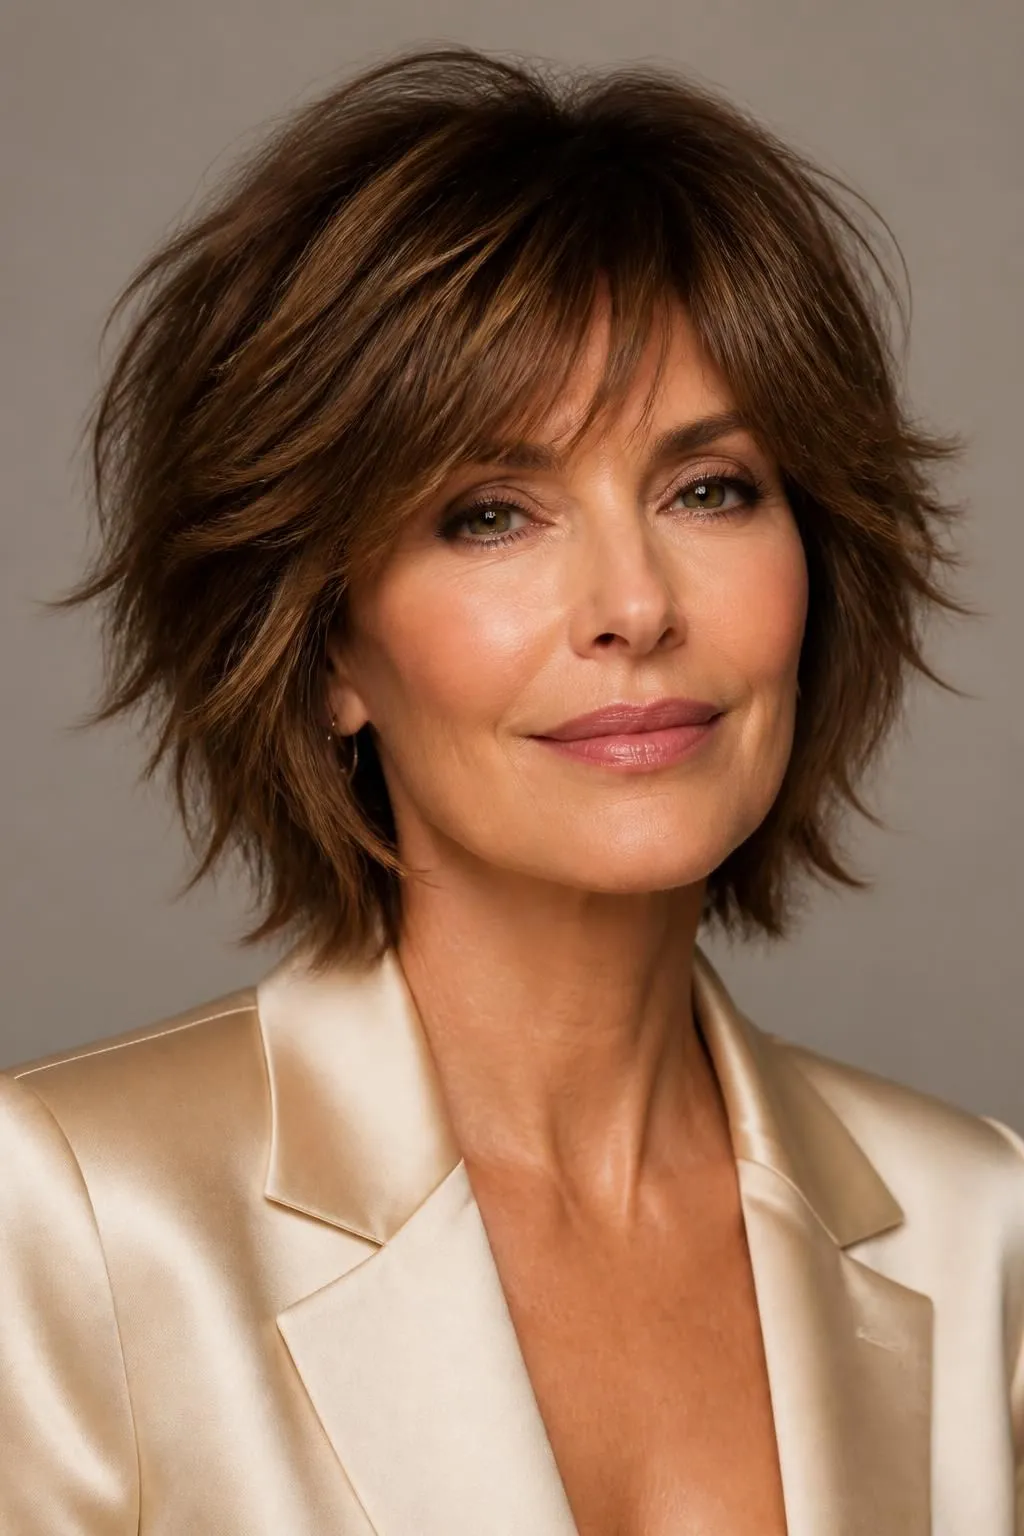
The layered shag bob combines the structure of a bob with shag-style layering, landing around the chin to collarbone. This hybrid cut is especially good for fine hair because the shorter length adds natural weight and body, while the layers on top add texture and movement without stripping away fullness.
This style looks polished for everyday wear yet has enough texture to look intentionally undone when air-dried or lightly tousled.
Tips for Styling a Layered Shag Bob
- Use a round brush to curve the ends slightly inward for a soft shape.
- Apply a texturizing spray to damp hair for natural-looking movement.
- Avoid heavy serums, which can weigh down the shorter length.
5. Layered Shag with Wispy Fringe
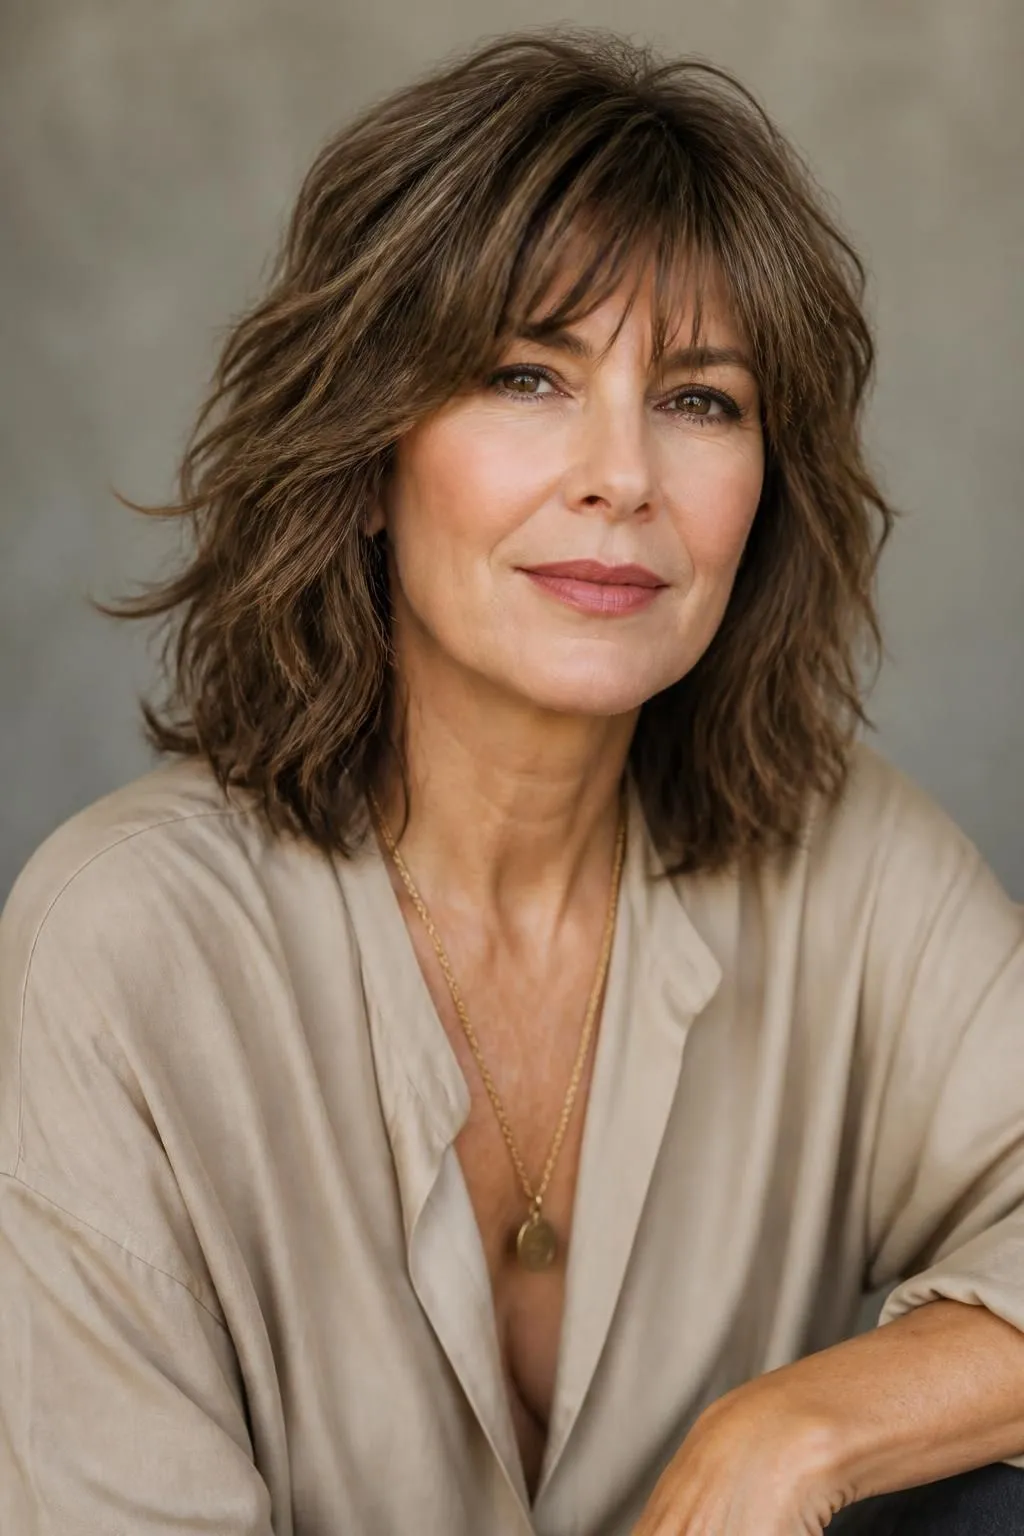
Wispy fringe consists of thin, feathered pieces that fall softly across the forehead rather than a thick, blunt line. Paired with a layered shag, this fringe style adds delicate volume near the face without looking heavy, making it a great option for those with thinning hair around the hairline.
The soft, textured nature of wispy fringe also blends effortlessly into the rest of the shag’s layers, creating a unified, natural look.
Tips for Styling Wispy Fringe
- Use a fine-tooth comb to separate bangs into thin, piece-y sections.
- Apply a small amount of pomade to the tips only for texture.
- Blow-dry on low heat to prevent frizz and preserve softness.
6. Feathered Layered Shag
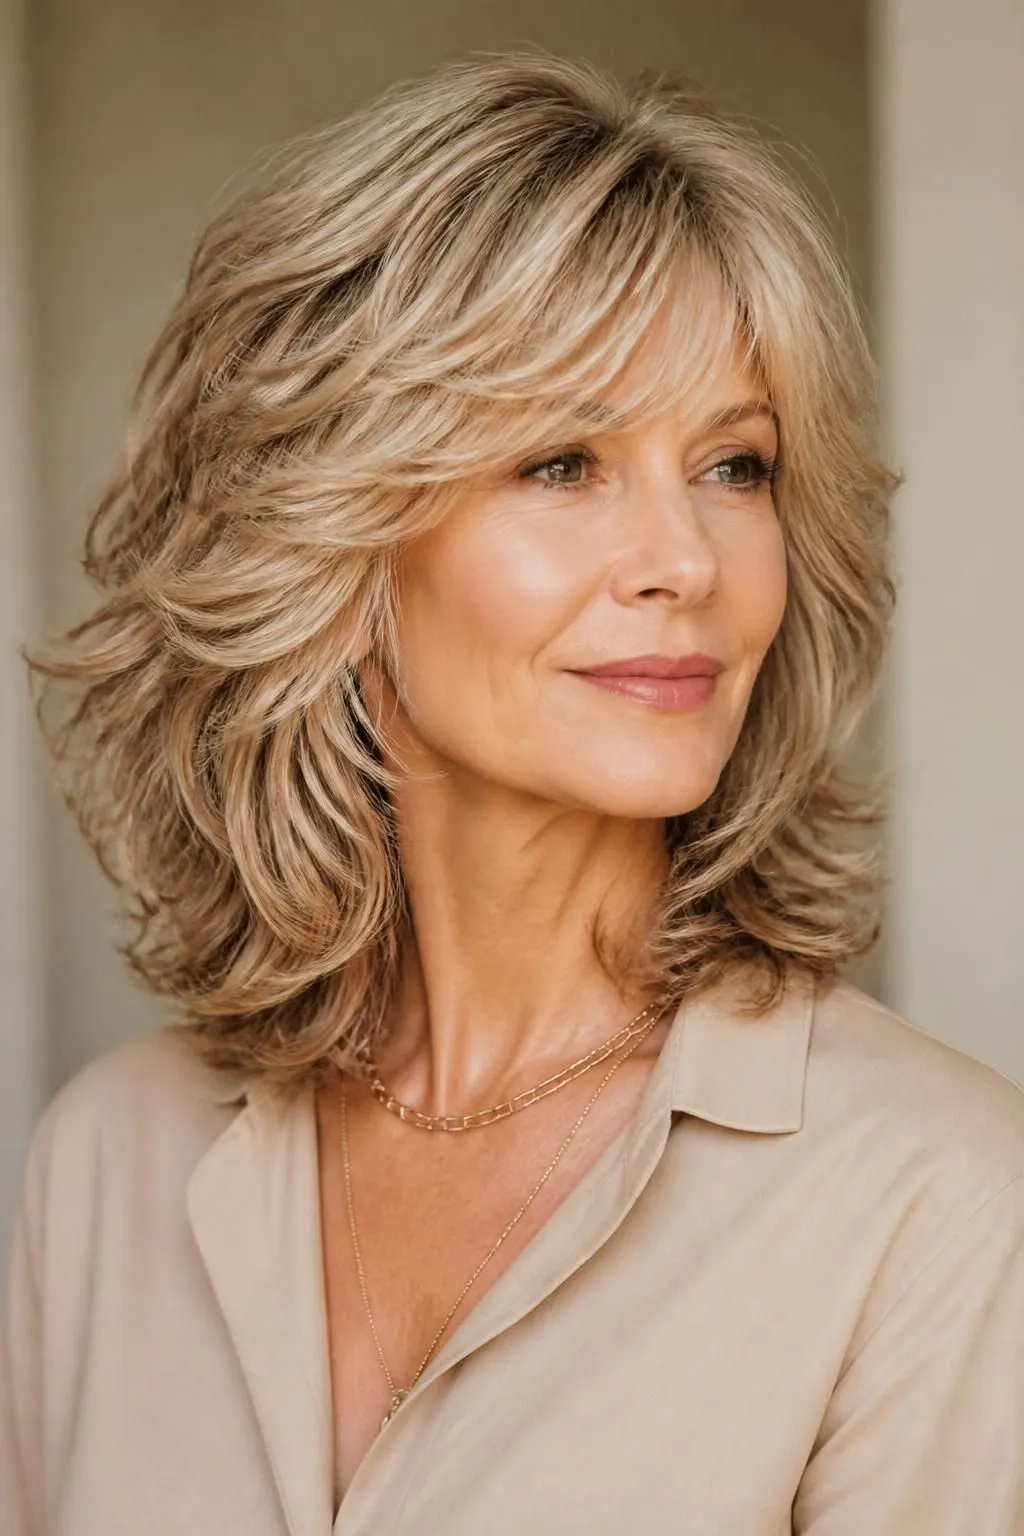
The feathered shag brings back a retro-inspired technique where layers are cut and styled to flip outward at the ends. This creates dramatic movement and volume, especially around the crown and sides, making it one of the most effective options for adding visible fullness to fine hair.
This nostalgic style has resurfaced as a modern favorite because it photographs beautifully and adds a glamorous, youthful energy to the overall look.
Tips for Styling a Feathered Shag
- Use a round brush to flip the ends outward while blow-drying.
- Hold each section with a cool air blast to lock in the flipped shape.
- Finish with a flexible-hold hairspray to maintain movement without stiffness.
7. Layered Shag with Face-Framing Layers
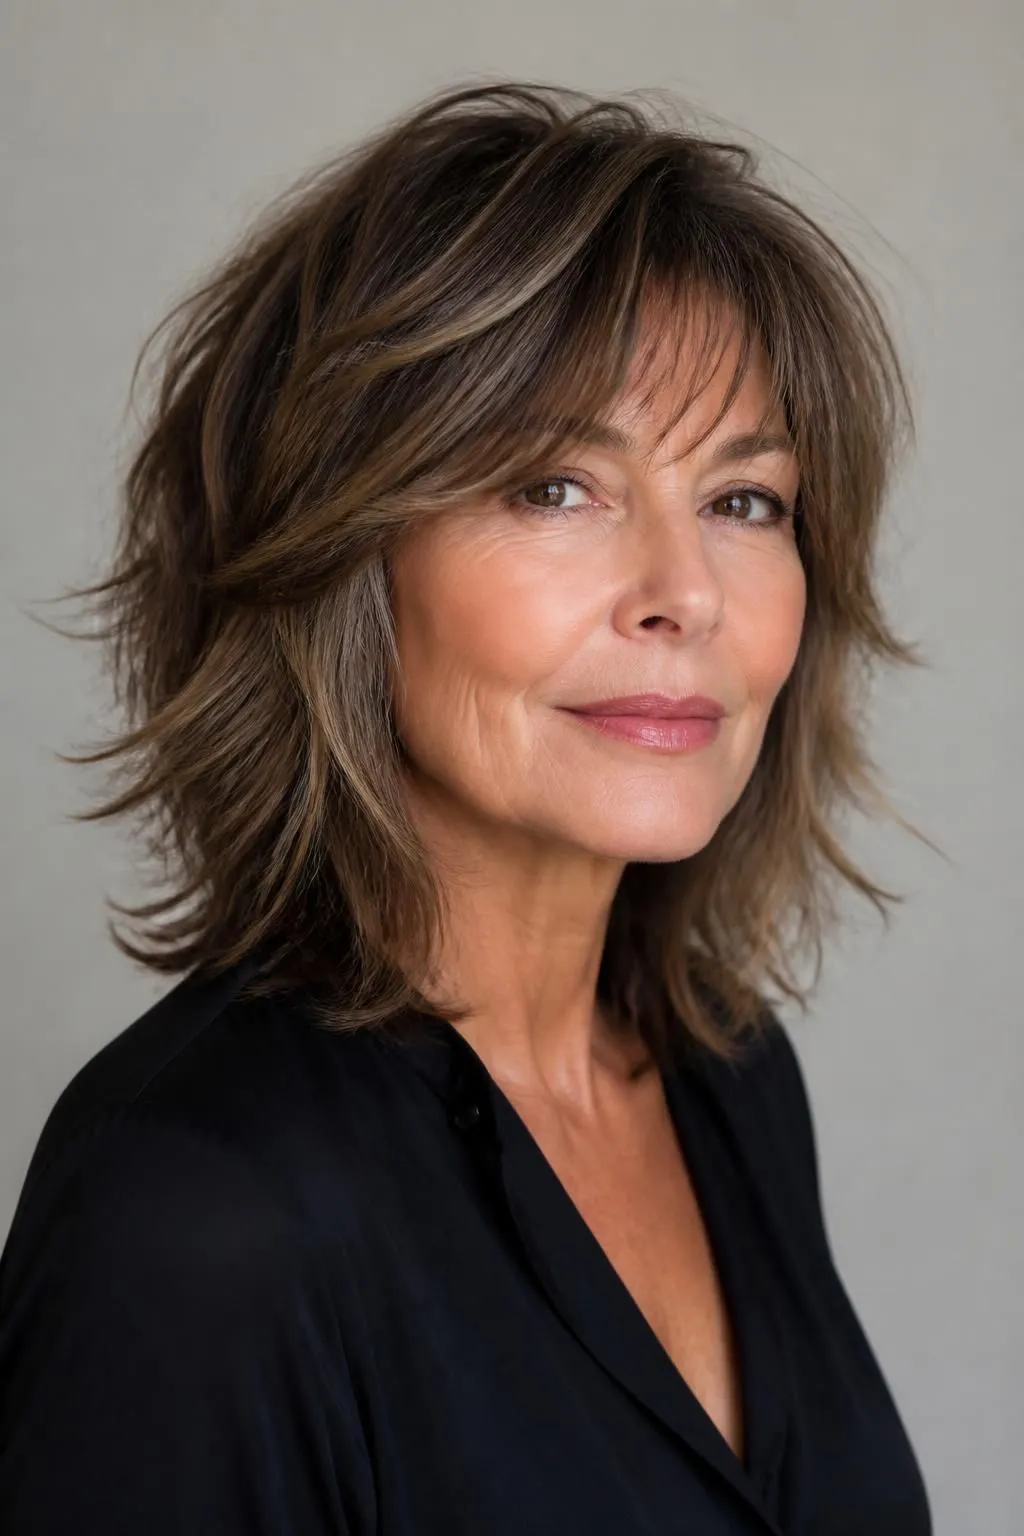
Face-framing layers are cut shorter around the front of the face, gradually blending into the longer layers throughout the rest of the shag. This technique draws attention to the eyes and cheekbones while adding noticeable volume exactly where it’s most visible, which can make the whole face appear more lifted and youthful.
This style works for nearly every face shape and is especially flattering for those wanting a softer, more feminine silhouette.
Tips for Styling Face-Framing Layers
- Curl face-framing pieces away from the face using a 1-inch wand.
- Apply a lightweight shine spray to keep these pieces looking healthy.
- Avoid over-straightening face-framing layers, as some movement enhances their effect.
8. Piecey Layered Shag
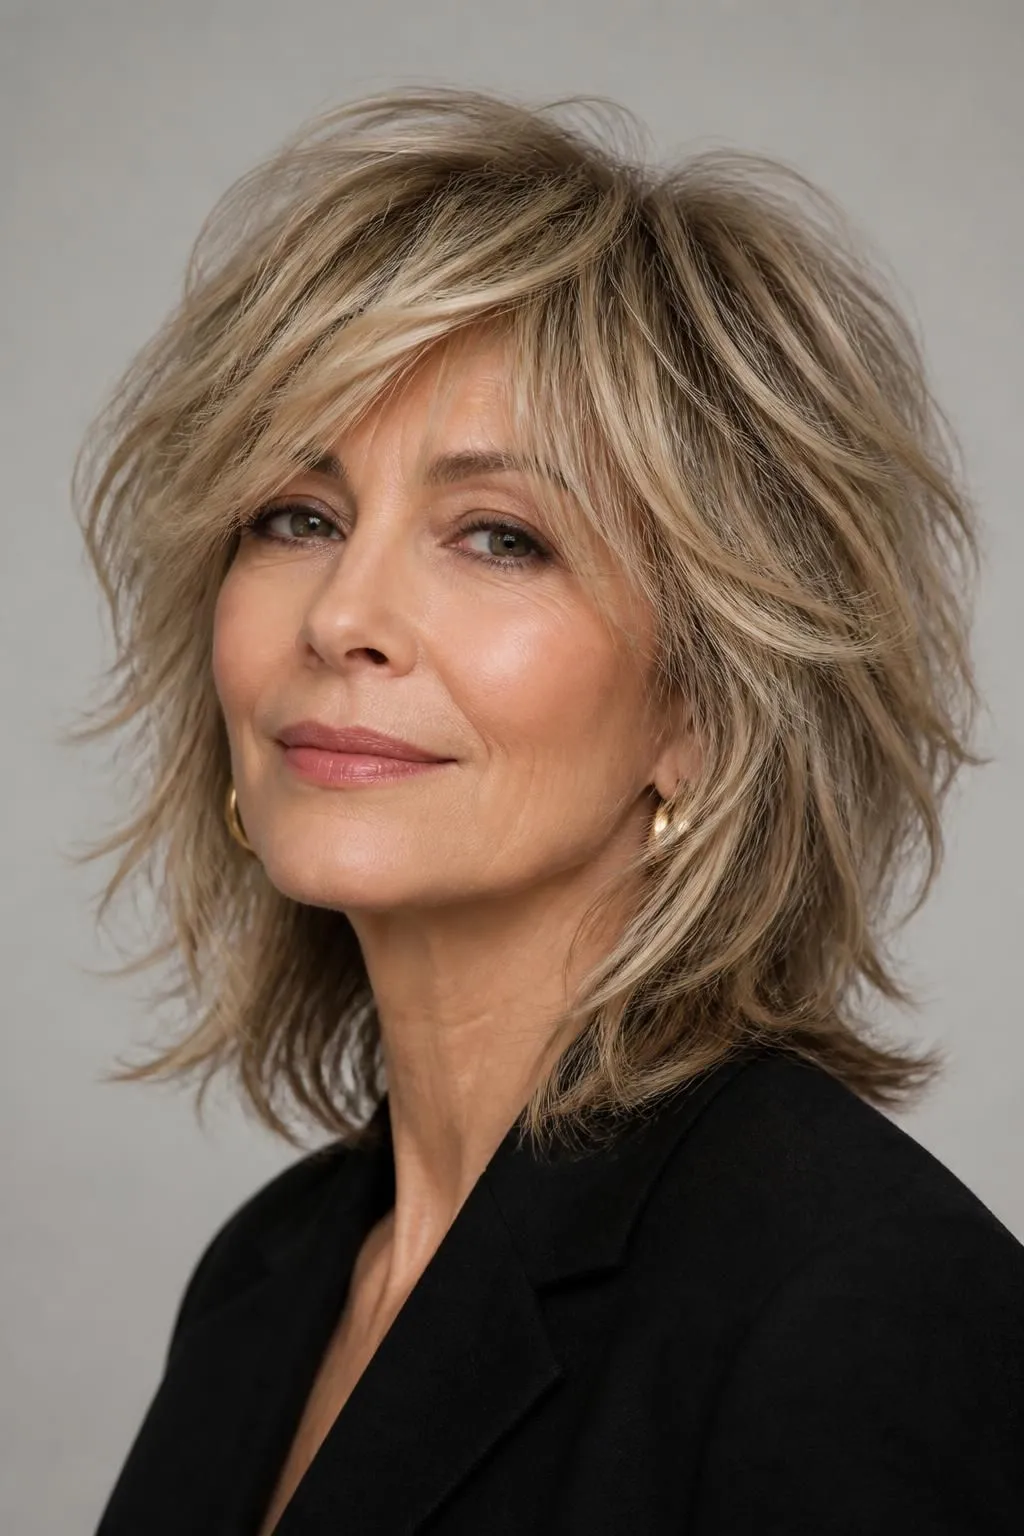
A piecey layered shag uses razor-cutting or point-cutting techniques to create distinct, textured sections throughout the hair. Rather than blending smoothly, individual pieces stand out slightly, giving the hair a lived-in, undone quality that adds visual thickness without looking overly styled.
This look is ideal for those who prefer a slightly edgier, more relaxed style that still photographs well and holds up throughout a busy day.
Tips for Styling a Piecey Shag
- Apply texturizing pomade to dry hair, focusing on the ends.
- Use your fingers rather than a brush to define individual pieces.
- Avoid smoothing products, which can blend pieces together and reduce texture.
9. Layered Shag with Root Perm
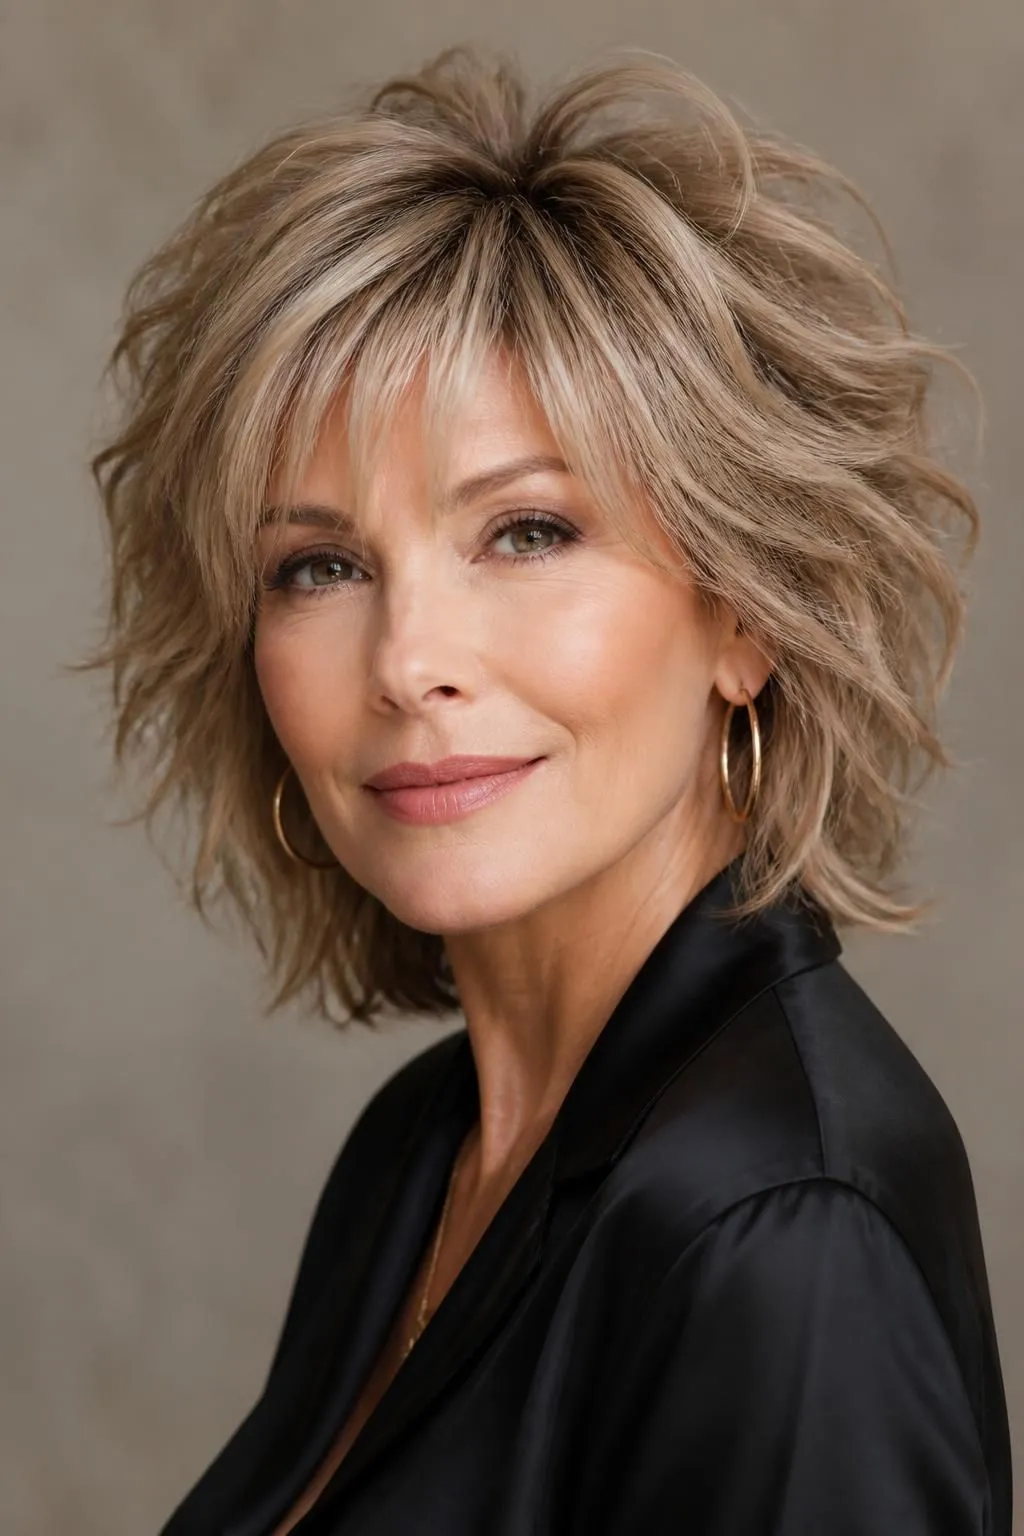
For fine hair that struggles to hold any lift on its own, pairing a layered shag with a gentle root perm can provide long-lasting volume. The perm is applied only near the roots, boosting height at the scalp while the shag’s layers add texture and movement through the rest of the hair.
This combination is especially helpful for those wanting consistent volume without daily styling effort, since the perm holds its shape for weeks between salon visits.
Tips for Maintaining a Root Perm with Layers
- Use a diffuser attachment to dry hair without disturbing the perm’s shape.
- Apply a lightweight curl cream to enhance the root texture.
- Avoid heavy oils near the roots, which can weigh down the perm’s lift.
10. Layered Shag with Balayage
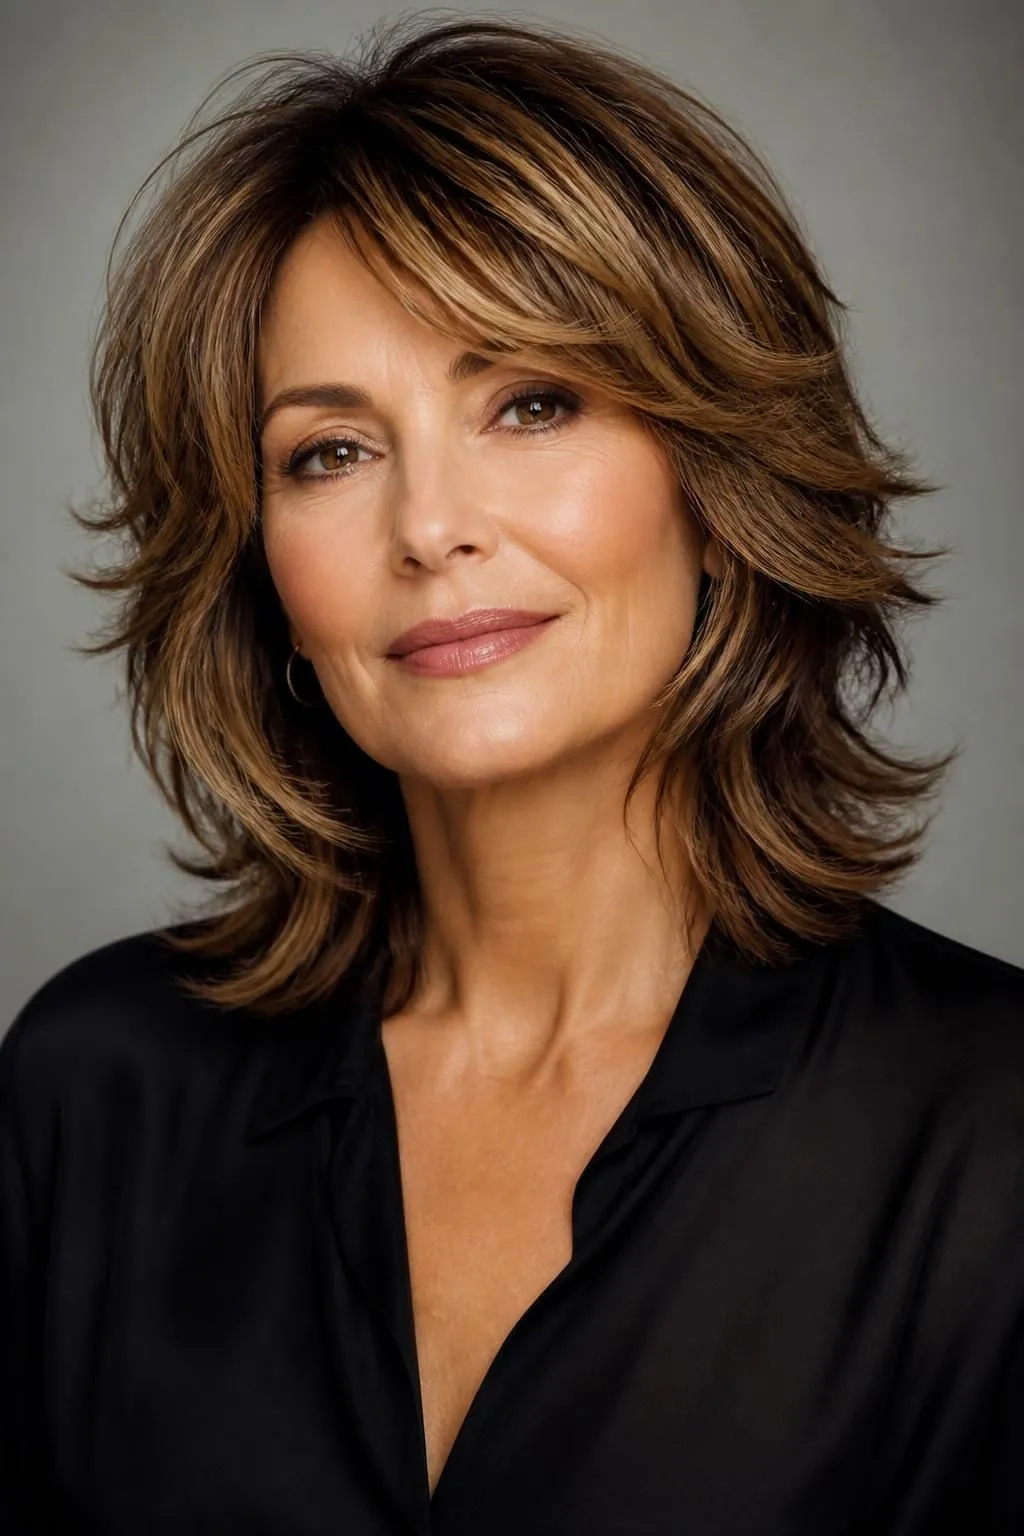
Balayage color adds dimension by painting lighter tones onto sections of hair, which creates the illusion of extra depth and thickness when combined with a layered shag. The contrast between light and dark tones highlights the movement of each layer, making fine hair appear fuller and more textured.
This combination is particularly flattering for softening gray regrowth or adding warmth back into hair that’s lost some of its natural richness over time.
Tips for Maintaining a Balayage Shag
- Use a color-safe, sulfate-free shampoo to protect tone between salon visits.
- Schedule a gloss treatment every couple of months to refresh color vibrancy.
- Apply a hydrating mask weekly to keep color-treated ends from feeling dry.
11. Layered Pixie Shag
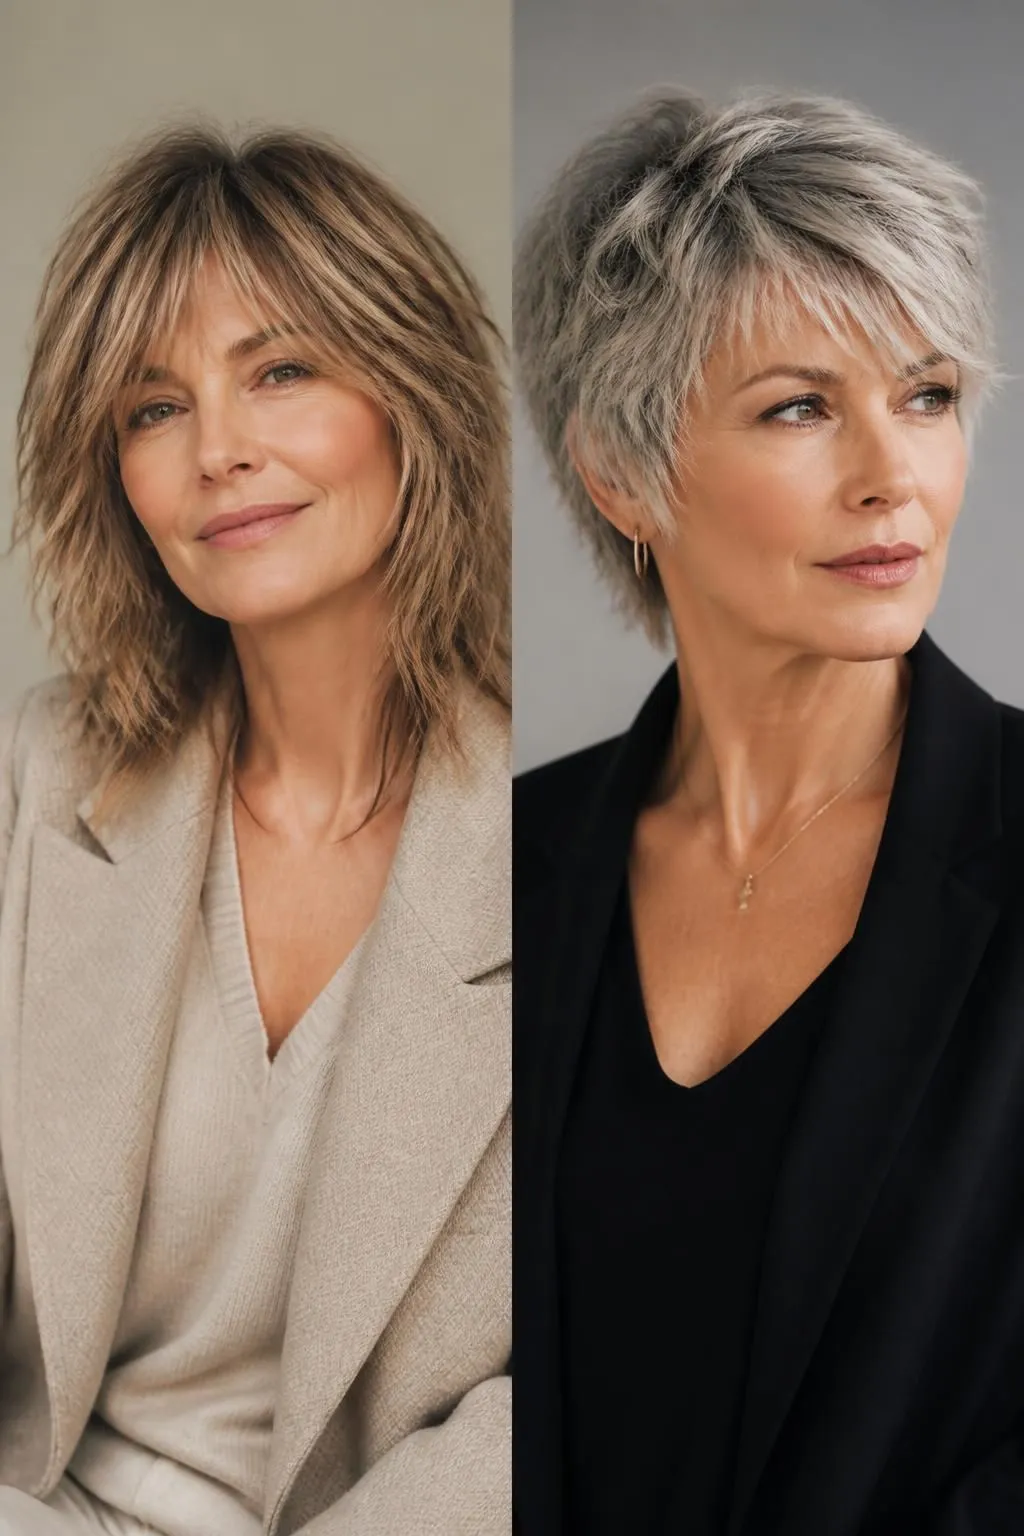
The layered pixie shag combines a cropped pixie length with shaggy, textured layers on top. This is one of the most effective options for maximizing volume on very fine hair, since shorter hair has less weight pulling it flat. The layered texture on top adds height and playful movement to the overall shape.
This cut is also remarkably low-maintenance, drying quickly and requiring minimal product to look polished and full.
Tips for Styling a Pixie Shag
- Apply a small amount of texturizing paste to dry hair, working it into the tips.
- Blow-dry with your head tilted forward for maximum root lift.
- Use a fine-tooth comb to separate layers for added texture.
12. Layered Shag with Side Part
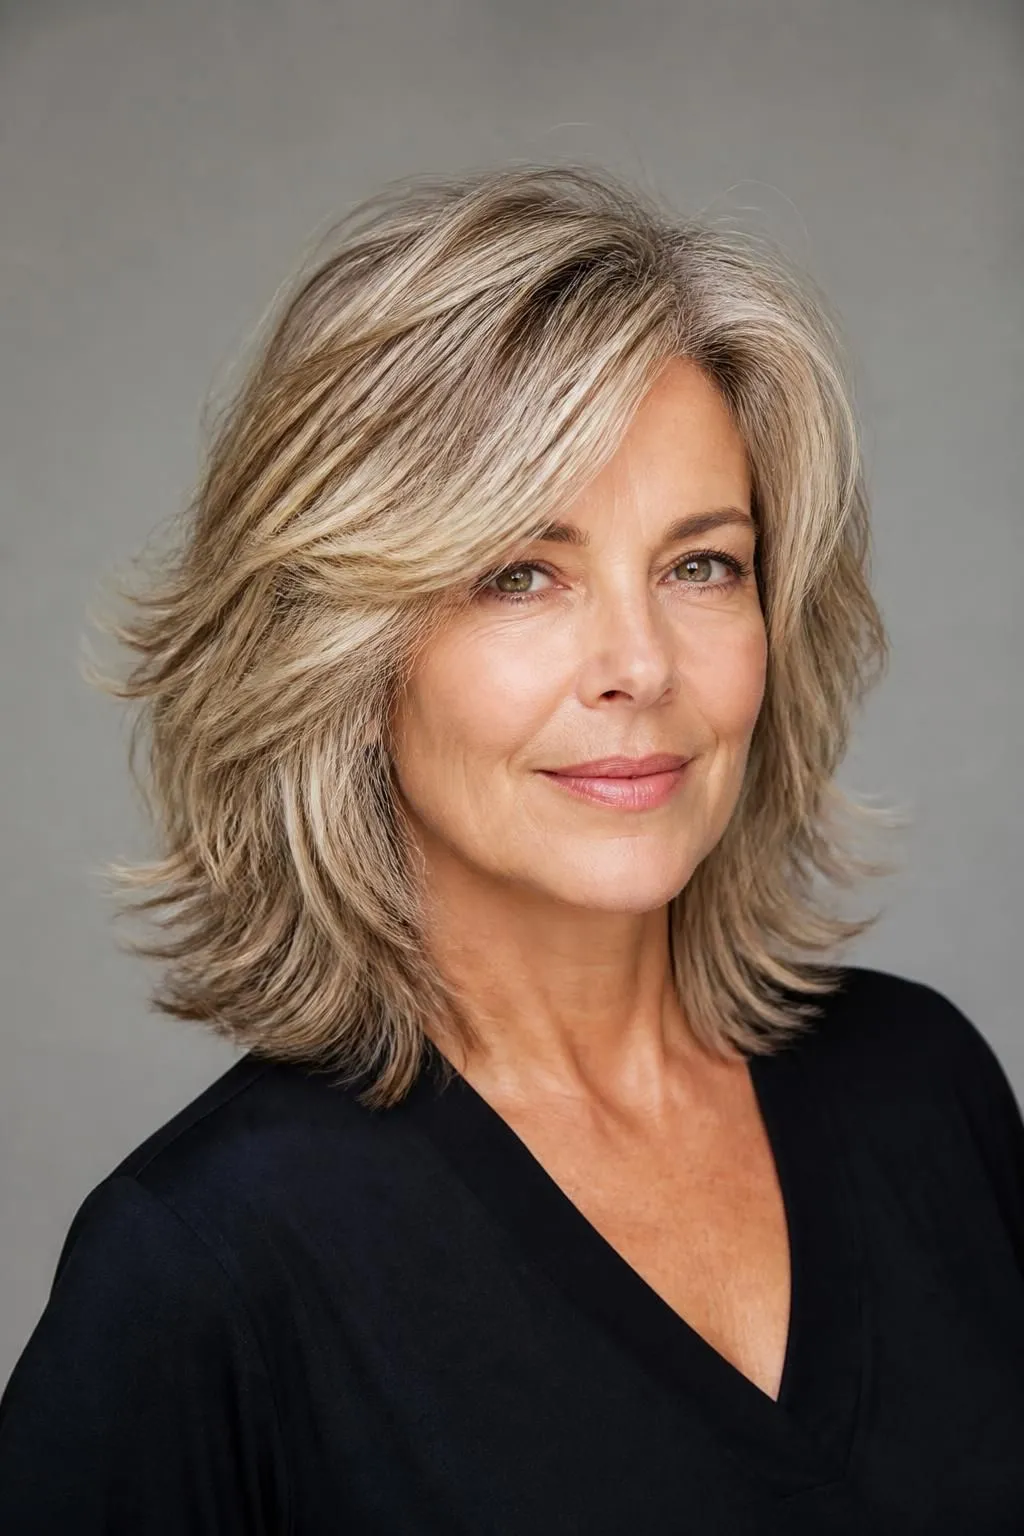
A deep side part paired with a layered shag instantly shifts weight and volume in a flattering way. This small styling change adds asymmetry and lift, particularly at the crown, making fine hair appear fuller from the front. The layers then add texture through the rest of the style.
This is one of the simplest ways to add volume without changing the actual haircut, making it a great option for those wanting more fullness between salon visits.
Tips for Styling a Side Part Shag
- Blow-dry roots in the opposite direction of your part before setting the final style.
- Use a small amount of root-lifting spray focused only at the crown.
- Tuck one side behind the ear for an easy, polished variation.
13. Layered Shag with Soft Waves

Soft, loose waves enhance the natural separation created by shag layers, adding dimension throughout the hair. For fine hair, this texture is especially helpful because straight styles can sometimes look flat, while waves catch light differently at each curve, creating the appearance of thicker, more textured hair.
This style is romantic and effortless, working well for both everyday wear and special occasions.
Tips for Adding Soft Waves to a Shag
- Use a 1 to 1.25-inch curling wand, alternating curl direction for a natural look.
- Apply a sea salt spray for beachy texture that holds without stiffness.
- Finger-comb curls instead of brushing them out to preserve volume.
14. Layered Shag with Blunt Fringe
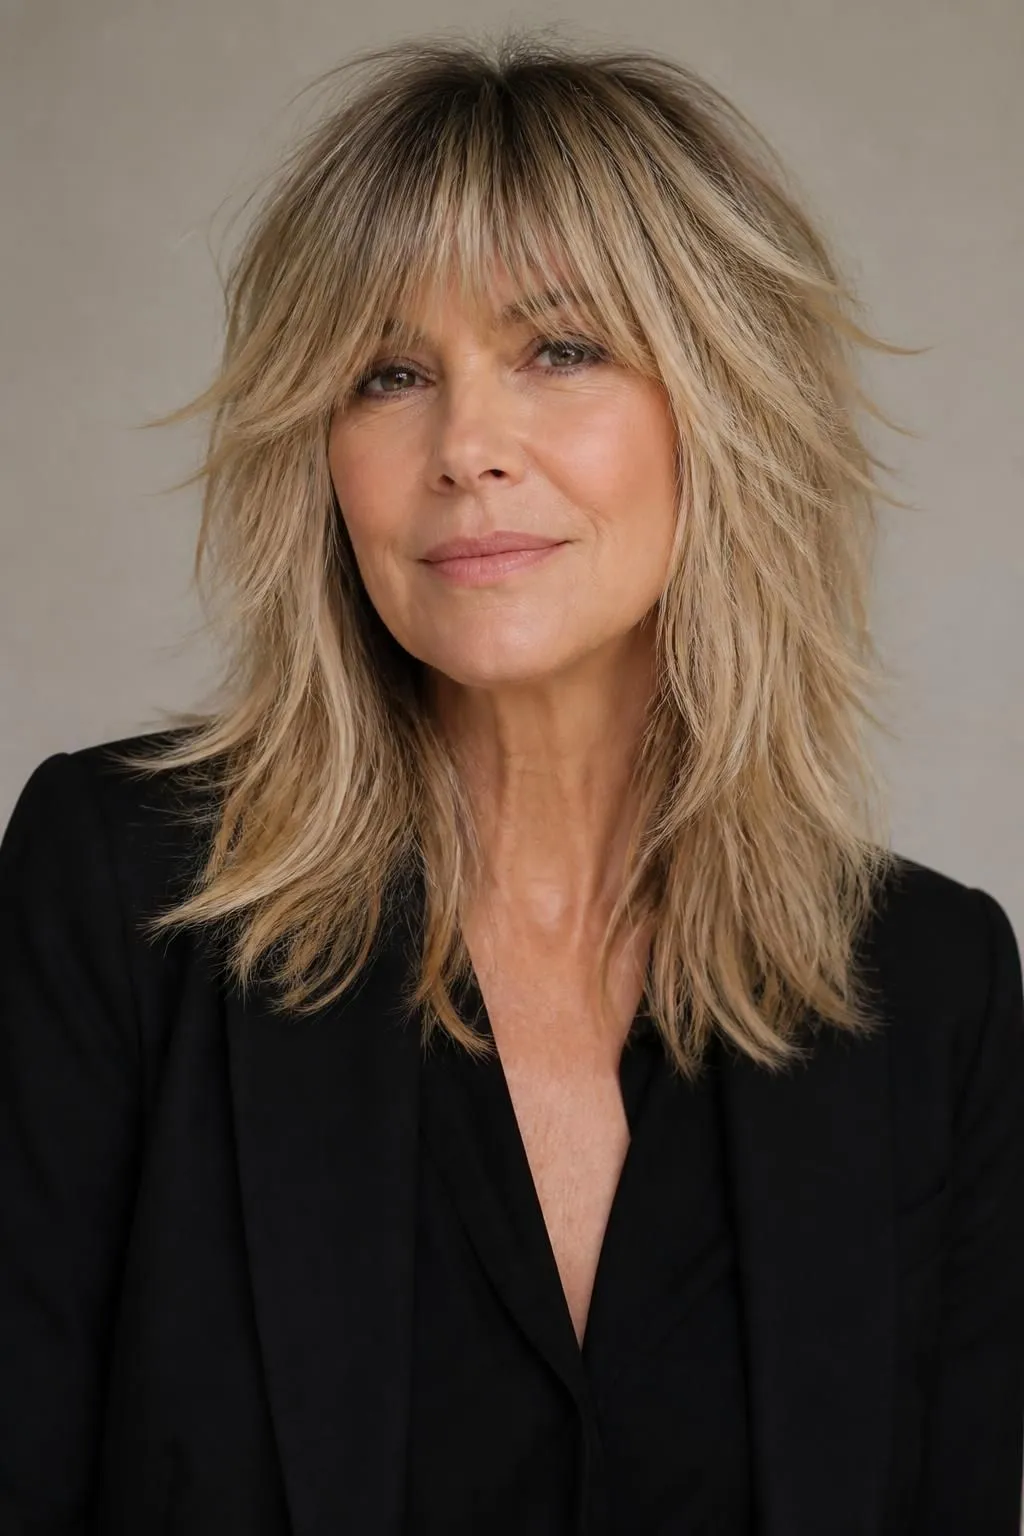
A full, blunt fringe paired with layered shag hair creates a bold contrast that adds instant fullness to the upper face. Unlike wispy bangs, a blunt fringe covers more of the forehead, drawing attention to the eyes while balancing longer face shapes.
This combination works well for those wanting a dramatic style with strong visual impact, especially when paired with textured, piece-y layers throughout the rest of the cut.
Tips for Styling Blunt Fringe with Layers
- Trim fringe every 3 to 4 weeks to maintain a crisp, defined shape.
- Blow-dry fringe flat using a paddle brush for a smooth finish.
- Apply a small amount of anti-frizz serum to keep fringe polished in humidity.
15. Layered Shag with Highlighted Ends
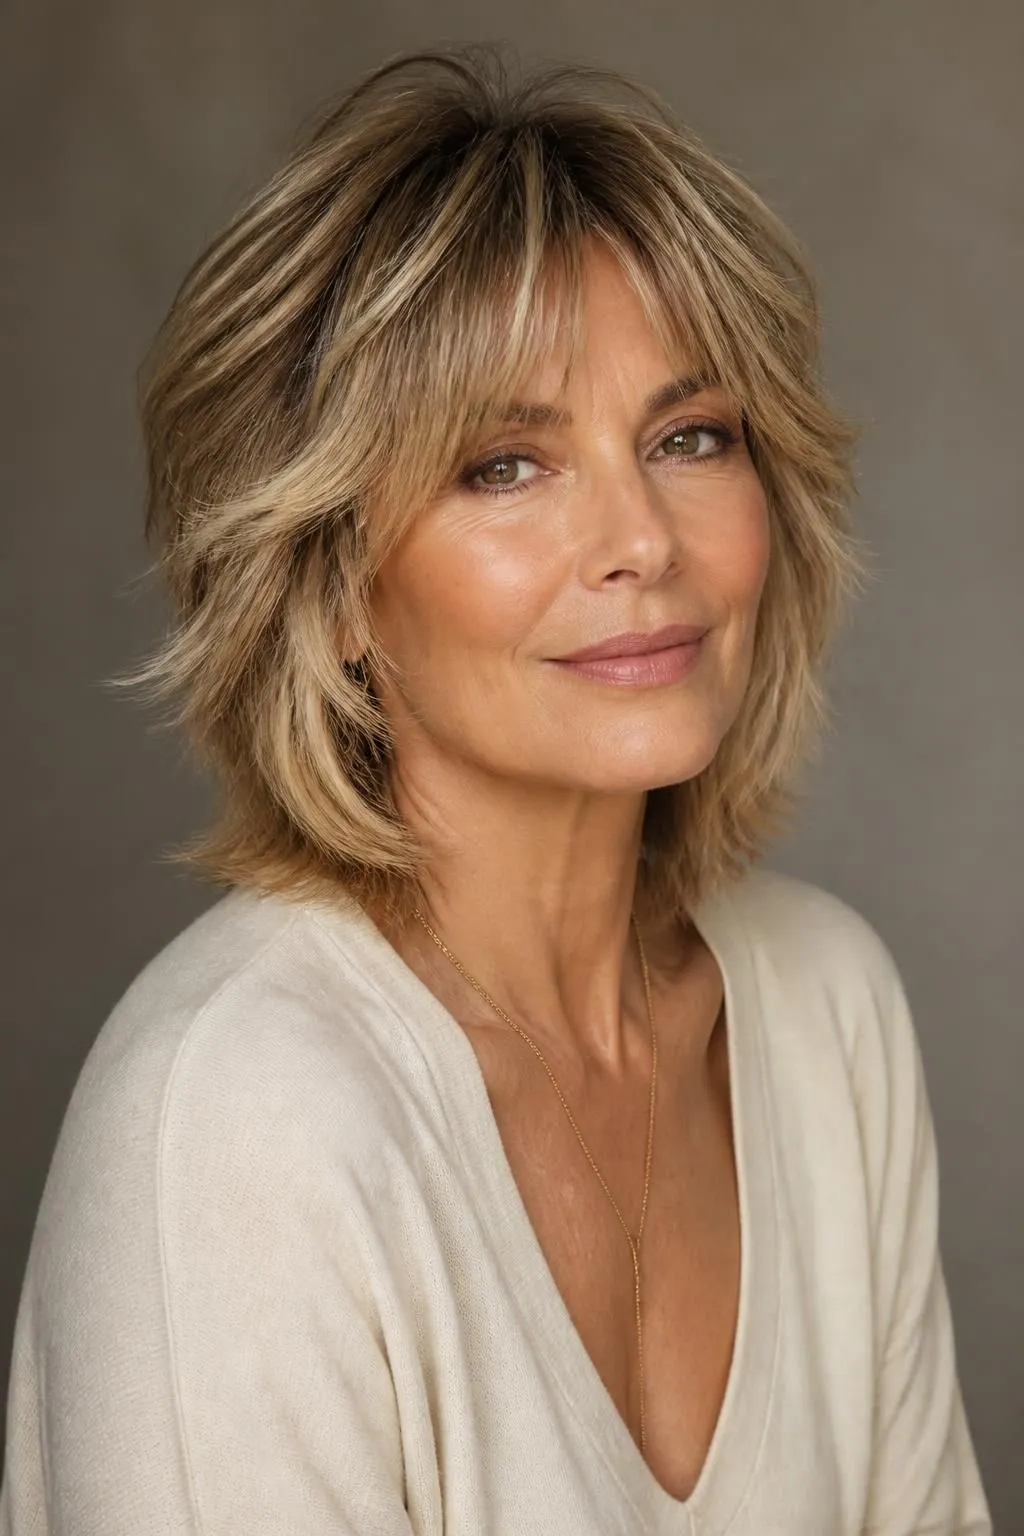
Rather than full-head color, highlights placed strategically on the ends of a layered shag can brighten the overall look while emphasizing the movement created by the layers themselves. This targeted coloring technique requires less maintenance than full balayage while still delivering noticeable dimension.
This approach works particularly well for adding brightness near the face and can help make thinner ends appear fuller and more vibrant.
Tips for Maintaining Highlighted Ends
- Touch up highlights every 8 to 10 weeks to keep them looking fresh.
- Use a toning shampoo to prevent highlights from turning brassy.
- Apply a leave-in treatment to keep highlighted ends hydrated and healthy.
16. Layered Shag with Volumized Crown

This variation concentrates shorter layers specifically at the crown, the area where fine hair often loses volume most noticeably with age. The concentrated layering at the top creates built-in lift, while the rest of the shag flows more naturally toward the ends, addressing thinning concerns directly at the source.
The result is a style that looks full and lifted immediately after styling, without requiring constant touch-ups throughout the day.
Tips for Styling a Volumized Crown Shag
- Blow-dry the crown section upside down before styling the rest of the hair.
- Use root-lifting spray focused only at the crown to avoid excess buildup.
- Try a light dusting of dry shampoo at the roots for texture and grip.
17. Layered Shag for Straight Fine Hair
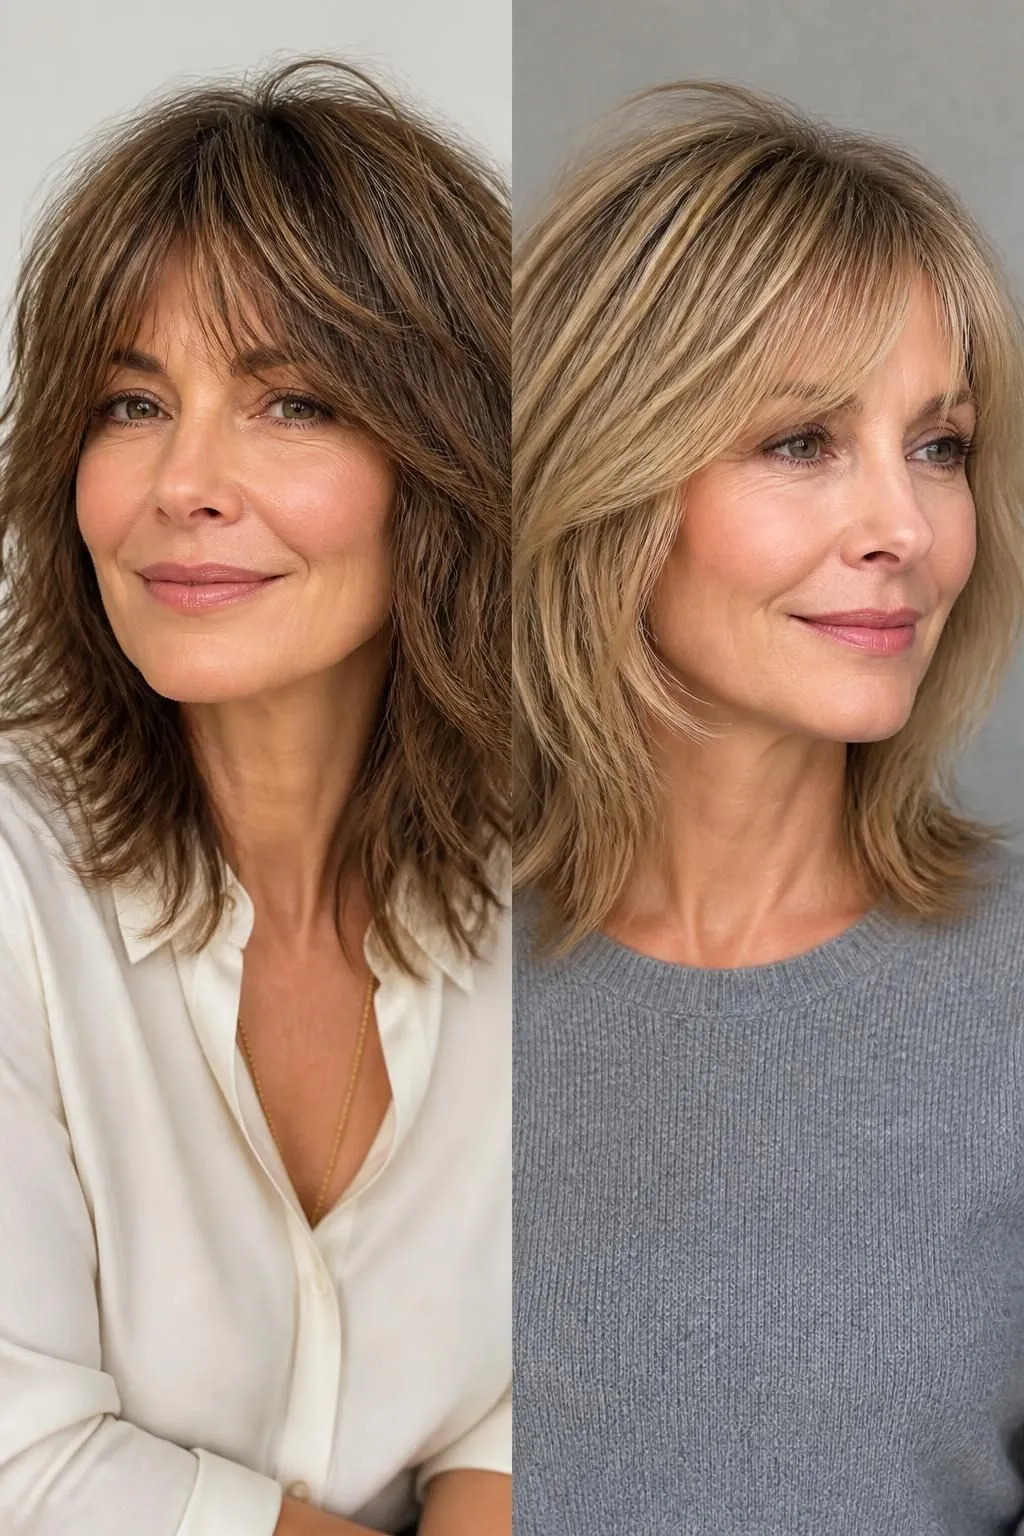
This variation is specifically tailored for naturally straight fine hair, using precise, evenly spaced layers rather than heavy, choppy texture. Because straight hair reflects light differently than wavy or curly hair, the layers are cut to create subtle movement without looking overly textured or messy.
This approach keeps the style looking sleek and polished while still delivering the volume benefits of a shag cut.
Tips for Styling a Shag on Straight Fine Hair
- Use a flat iron on the ends only to maintain a smooth, polished look.
- Apply a lightweight volumizing spray at the roots before straightening.
- Avoid heavy oils, which can make straight fine hair look flatter.
18. Layered Shag with Textured Ends
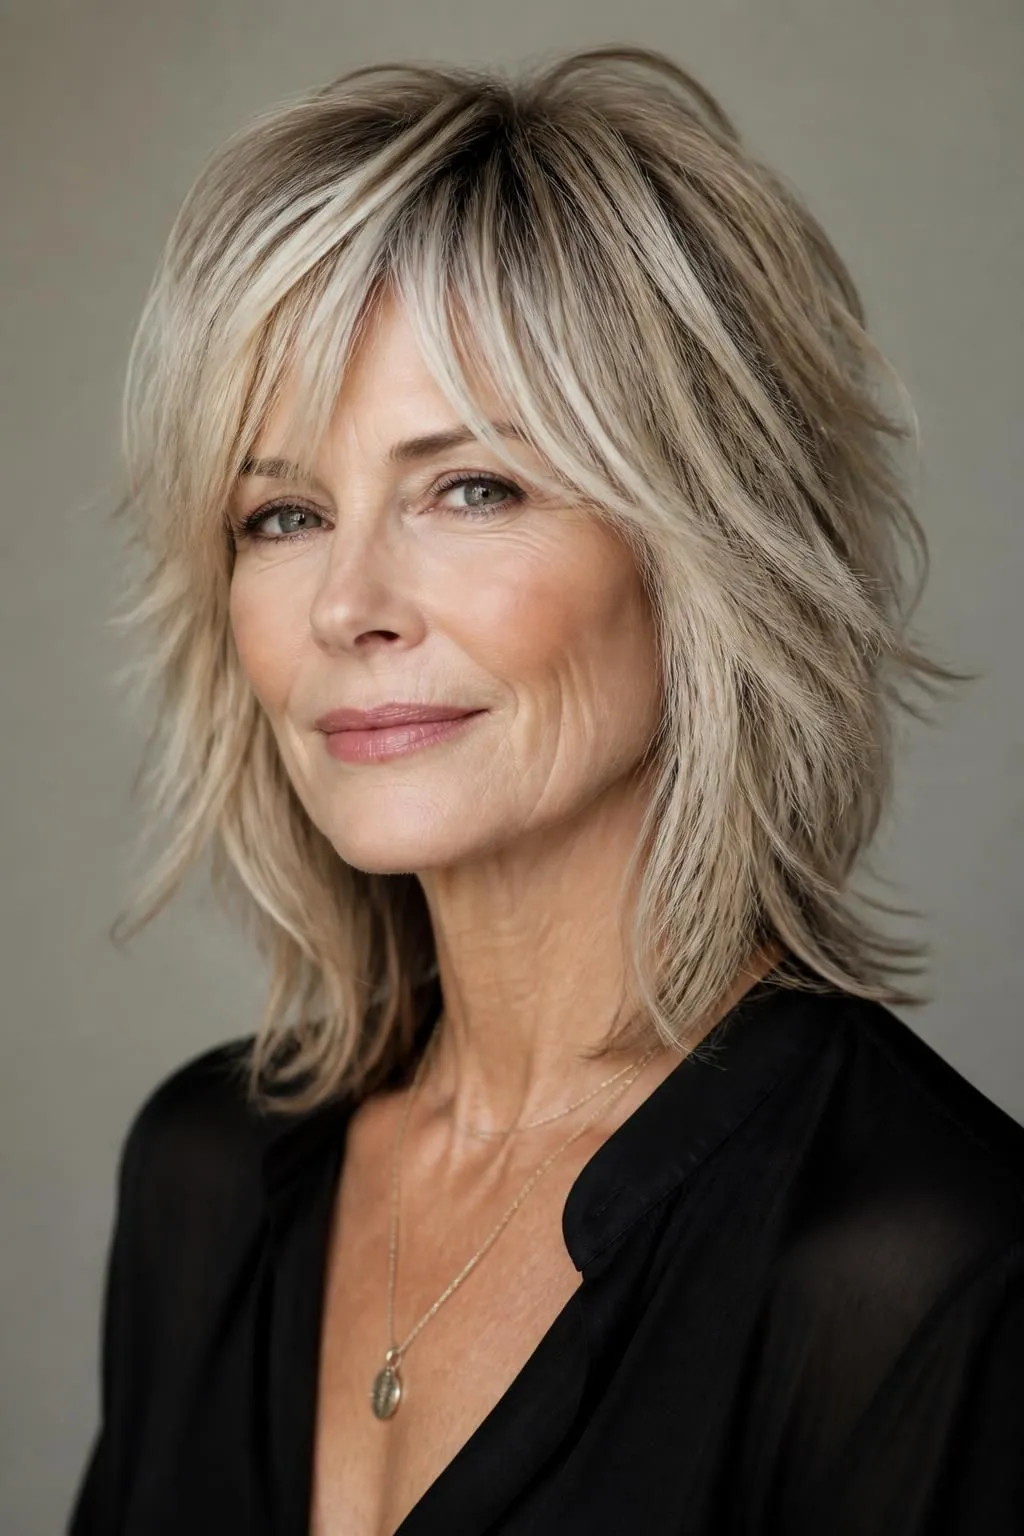
This final variation focuses on adding texture specifically at the ends of the hair, using razor-cutting techniques to create soft, feathered tips throughout an otherwise classic layered shag. This subtle texturizing prevents the ends from looking blunt and heavy, keeping the overall silhouette light and full.
This style pairs well with almost any length and offers a versatile finishing touch that enhances the effect of the layers cut throughout the rest of the hair.
Tips for Styling Textured Ends
- Apply a small amount of texturizing cream to the ends only, avoiding the roots.
- Use a diffuser or air-dry to let natural texture show through.
- Avoid heavy brushing, which can smooth away the textured effect.
FAQs
Do layered shags make fine hair look fuller? Yes, the varying layer lengths add texture and separation, which creates the visual effect of thicker, more voluminous hair even when the actual hair density stays the same.
What is the best shag length for women over 50 with fine hair? Shoulder-length to chin-length shags tend to work particularly well, offering enough weight for shape while staying short enough to avoid looking flat or stringy.
How often should a layered shag be trimmed? Most layered shags benefit from a trim every 6 to 8 weeks to keep the layers fresh and prevent the cut from losing its shape as hair grows out.
Is a perm necessary for volume in a layered shag? No, a perm is optional. Many layered shags achieve plenty of volume through cutting technique and styling alone, though a light root perm can help those wanting longer-lasting lift.
Best Styling Habits for Fuller-Looking Fine Hair
Building volume in fine hair comes down to consistent habits, not just the right haircut. Blow-drying upside down, applying root-lifting products directly to the scalp, and avoiding heavy conditioners near the roots all help maintain fullness day to day. Regular trims every 6 to 8 weeks keep layers from growing out and losing their shape. Combining these habits with a well-cut layered shag ensures fine hair looks consistently fuller, more textured, and more youthful with minimal daily effort.
Final Words
A layered shag is one of the most reliable ways for women over 50 with fine hair to achieve a fuller, more youthful look without constant styling struggles. From classic long layers to bold feathered flips, these 18 variations show just how adaptable this cut can be for different lengths, textures, and lifestyles. Talk with your stylist about which layering technique suits your hair best, and enjoy a shag that brings lasting volume and movement to your everyday routine.